
Introduction
This text will be used to illustrate the structure of a training day in football. Recently it has become quite popular to use scientific terms and support every work with scientific evidence, but in the world of football, some things have not yet been tested or are simply not that easy to confirm. If you work in football and are familiar with the literature, you may have seen that a football team consists of several groups of players participating in the competition. These groups include starting players, substitutes, travel squad members who did not participate in the match, non-traveling players, players in the rehabilitation process, those on national teams, and finally, a special group – those who are jumping into your preparation or competition system without having participated in the team’s training process.
Each of these player groups requires a different approach when it comes to programming training loads and constructing a training day. In addition to these player groups, there are other interesting chaotic scenarios that will influence your decisions during construction of a training day in football. In this text, I will try to mention those scenarios. Before explaining each of them in detail, let’s first list them:
- Most recent match date
- Minutes played in the match
- Next match date
- Seniors or youth football
- Length of the week
- Match frequency (one or two per week)
- Team status for that week or day – monitoring
- Weekly and training day goals
- Number of available players
- Discussion with the coach
Most Recent Match Date and Next Match Date
It’s hard to say which of the factors listed above are the most important because each one can determine the course of a training day, but the timing of the last match and the next match carry a considerable weight.
In football terminology, we use terms like MD- (match day minus) and MD+ (match day plus) to indicate where we are in the timeline. MD- represents the number of days left until the next match, while MD+ indicates how many days have passed since the last match.
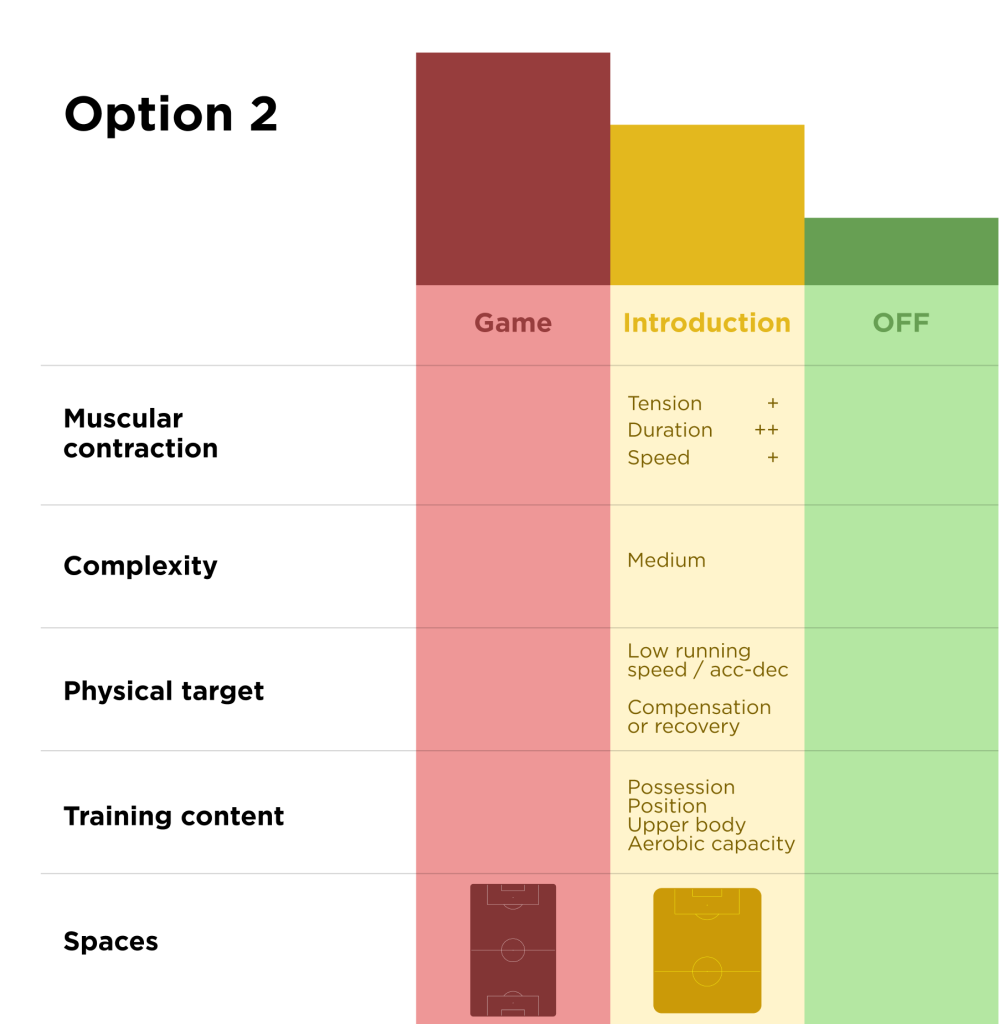
Typically, three terms are mentioned (depending on the length of the week): MD+1, MD+2, and MD+3. In practice, you will most often encounter the first two terms, which symbolize two days with a recovery character. On these days, certain characteristics are attached that define them.

In football, match days vary – matches can be played on Fridays, Saturdays, Sundays, and Wednesdays. Because each match day and the days around them have different characteristics, when we use the notation MD-/+, MD+1 always symbolizes the day after the match, which has its own features. This way, for me as a conditioning coach, and for the coaching staff, it’s clear what content can be applied on that day.
The process of constructing a training day after a match begins immediately after the match ends. One important factor in creating the next day’s plan is definitely the location of the match. If we’ve had a home match, I typically suggest scheduling training for 11:00 AM the next day. I believe that with this schedule, players have enough time for rest, sleep, and breakfast, before coming to the facility for a post-match assessment and training session that usually focuses on recovery.
In the case of an away match with a shorter journey, we may still decide to have a similar training schedule as in the first scenario. However, for matches with a long journey, it may sometimes be insisted that the team stays overnight at the match location. This allows players enough time to get quality sleep and rest, which can be crucial for adequate recovery. In such cases, the training session is usually scheduled on the second day after the match, marked as MD+2, and typically has a recovery-oriented character.
Match Day +1
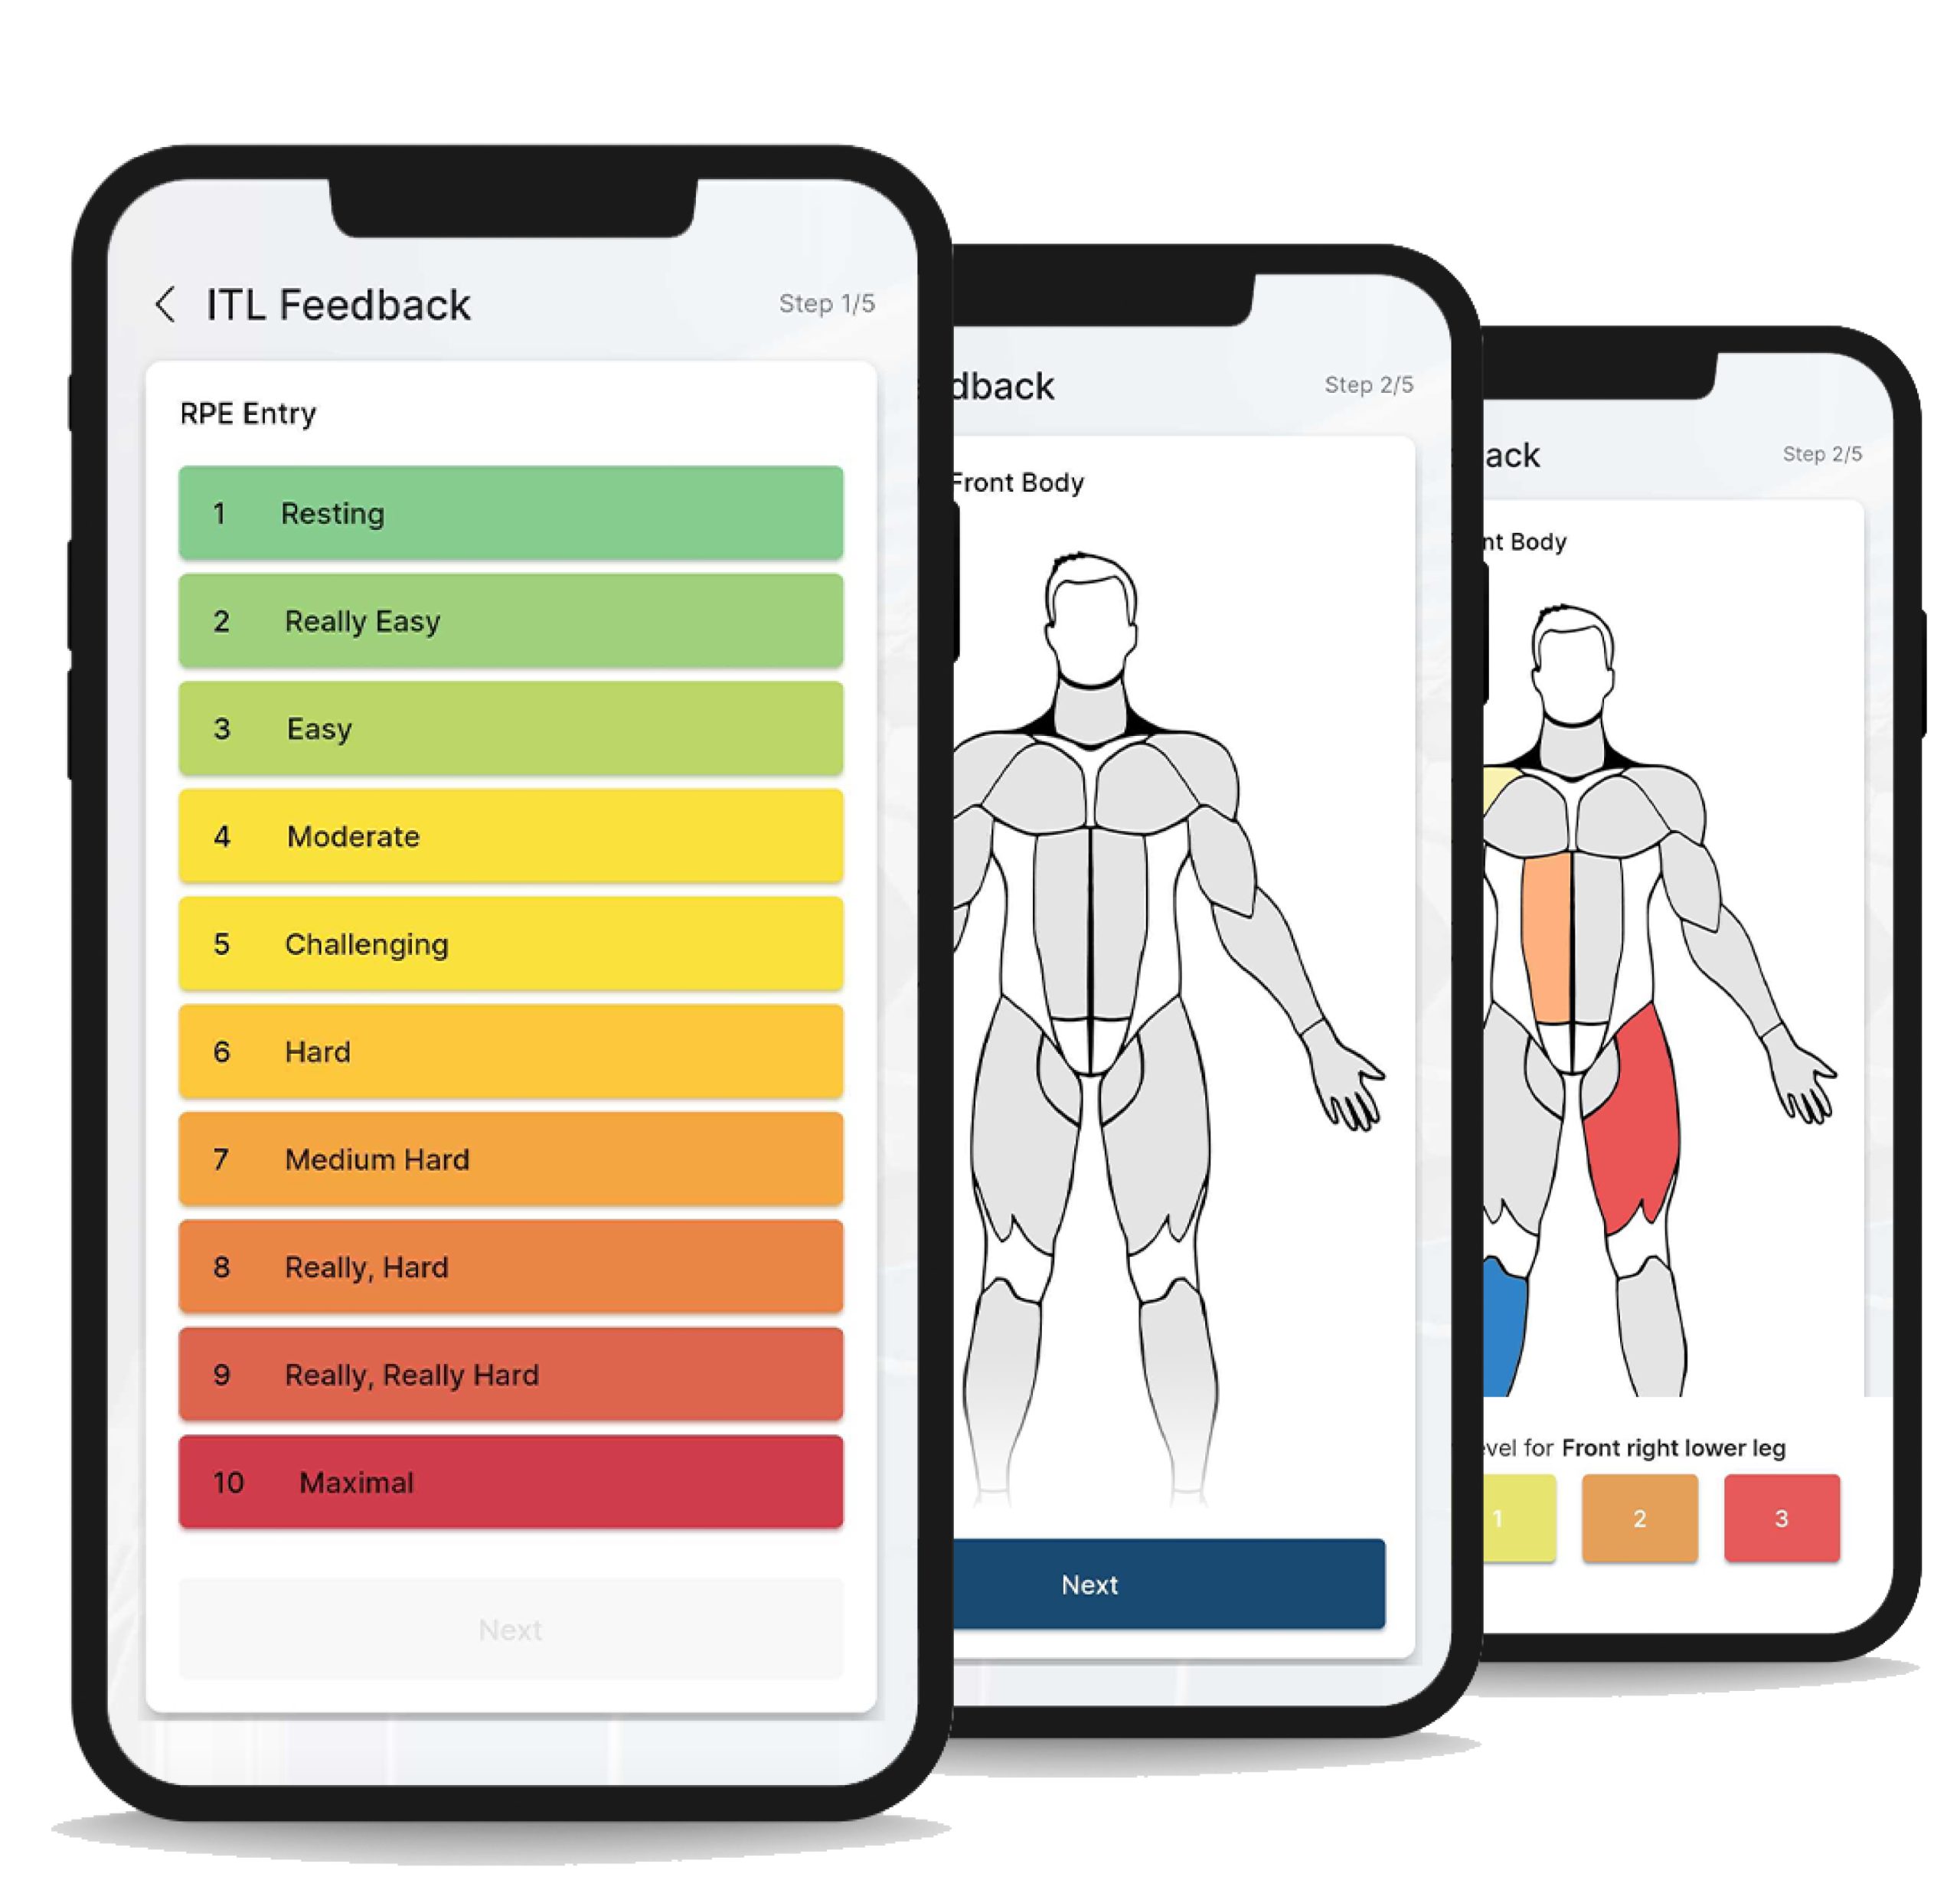
The day after the match is used to gather as much information as possible about all players who took part in the game, regardless of their time on the field (I will touch on compensation training and reduced playing time later). Players who played more than 60 minutes will almost certainly be tired – to track their condition, we rely on a combination of wellness and TQR (Total Quality Recovery) questionnaires. The duration and quality of sleep will also be affected by the match, so that part needs to be considered as well when examining questionnaire responses.
During training, I am interested in any painful or inflamed areas so that I can immediately address them or direct the player to seek appropriate care from a physiotherapist or doctor. It’s important not to be fooled by the amount of playing time – there were cases where players who had been on the field for 45 minutes showed a higher intensity and action density than those who played 60 minutes. Let that be a reminder that we should never forget about the match context.
Coaches often make comments like, “Let them join regular training, it was only a 45-minute game, what could go wrong?” While this may be true in some cases, access to microtechnology or GPS systems enables us to see the true exertion levels during those 45 minutes. In one such match, we were losing, and we had to catch up, so the coach inserted more offensive players who had to chase the game the whole time to salvage a point or secure all three points.
My recommendation for MD+1 wasn’t for them to skip training and focus solely on recovery, but rather to perform activities they didn’t get enough of during the match – in this case, volume. To roughly divide what measurements are collected during the match, I would mention three categories:
- Accelerations, decelerations, and changes of direction
- High-intensity running at speeds over 19.8 km/h
- Total distance covered
We can also add categories for shots taken, aerial duels, and ground duels. Typically, I would put players who played more than 60 minutes into recovery training on MD+1. Other players with less playing time participate in compensation or leveling training to simulate the match load and stay in sync with the starting eleven.
Substitutes will focus on activities that make up for the activities they missed. If you don’t have access to GPS data, video analysis of the match can provide insights into the player’s actions during the game. Certainly, what needs to be made up for is the match volume and some high-intensity activities.
From the Locker Room to the Field
As soon as I arrive at the club, my first stop is the physiotherapy and medical rooms. Through a brief meeting lasting 10 to 20 minutes, I can gather all the information I need about the team’s condition, which will help me construct the training day. Following this meeting, I sit down with the head coach and the coaching staff for a detailed discussion, where we plan each player’s activities for MD+1. Once we’ve determined which players will be involved in which aspect of the training, I proceed with the construction of training content.
Typically, the training content is divided into two groups: one group is focused on recovery training, while the other group participates in compensation training.
After this phase, I head to the field or gym to prepare everything necessary for the training session. Additionally, I carry out individual preparations or conduct additional tests for players assigned to the compensation training group. These tests may include evaluations such as the 5-second adductor squeeze test, long jump assessments, or countermovement jumps.
Recovery Group
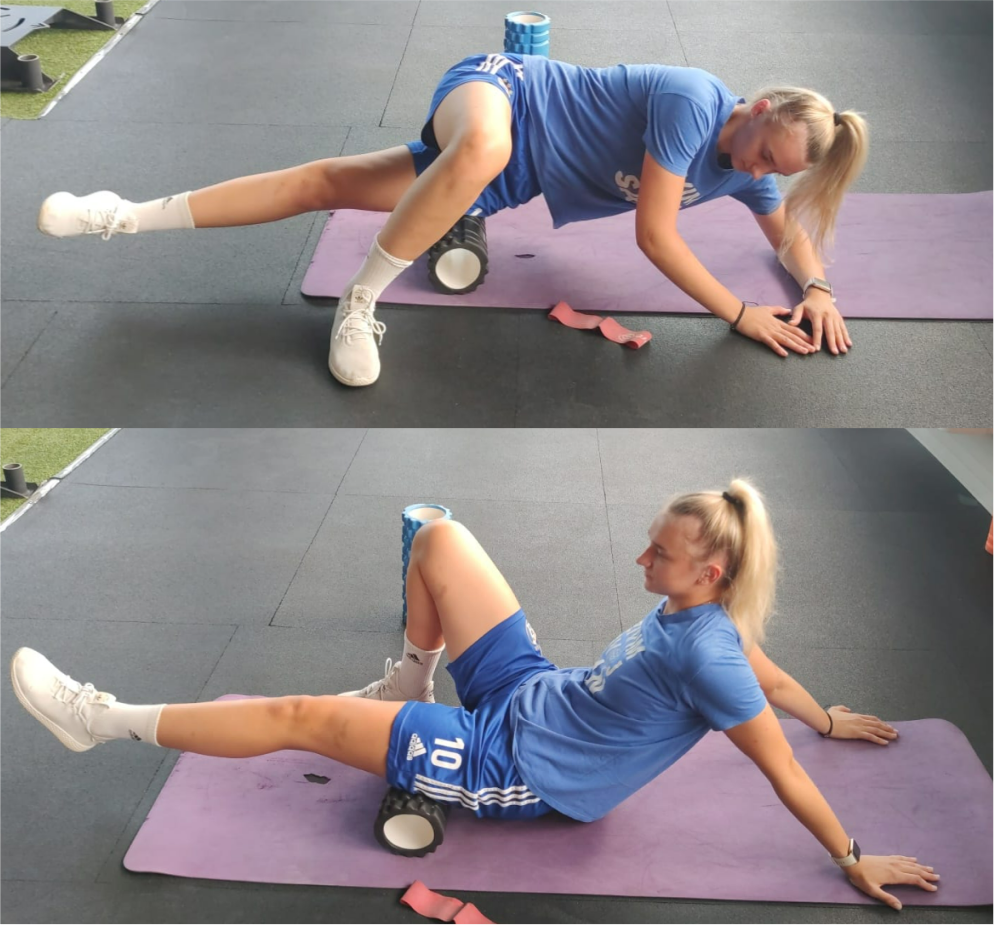
We start our training sessions with myofascial release exercises, with focus on specific body regions such as the front and back of the thighs and adductors. After addressing these critical areas, I allocate a few extra minutes to work on the regions that are important to them.
Myofascial release is a technique that involves applying pressure to specific points, as explored in the work of Hopper and Deacon (2015) [1], to release accumulated muscle tension. According to research by Cheatham and Kolber (2015) [2], these techniques can significantly enhance muscle flexibility. Increased flexibility allows athletes to achieve a greater range of motion, thereby reducing the risk of injuries. This is supported by the findings of Weerapong, Hume, and Kolt (2005) [3], which also indicates that myofascial massage can help reduce inflammation in muscles and tissues.
Moreover, improved blood and lymph circulation resulting from myofascial release can help with efficient removal of waste products from muscles, resulting in quicker recovery and reduced post-match inflammation.
The psychological aspect should not be underestimated either. In my experience, players may initially be hesitant about this form of treatment, but once they witness the benefits for themselves, they often change their perspective.
In my work with women’s football team WFC Dinamo, I started incorporating myofascial release techniques and individual preparation routines before our training sessions. Initially, there was some resistance, and it took some time to educate the players about the importance of these techniques and convince them of the benefits. Today, after several months of work, it has become second nature to them; they independently dedicate 15 to 20 minutes in the gym before we begin our team training to their individual preparations.
Following the relaxation phase, we incorporate static stretching and mobility exercises into our routine. Static stretching exercises target four key muscle regions, and these exercises are typically present in every recovery training session:
- Hamstrings band stretch
- Frog stretch
- Hip flexors stretch
- Calf stretch
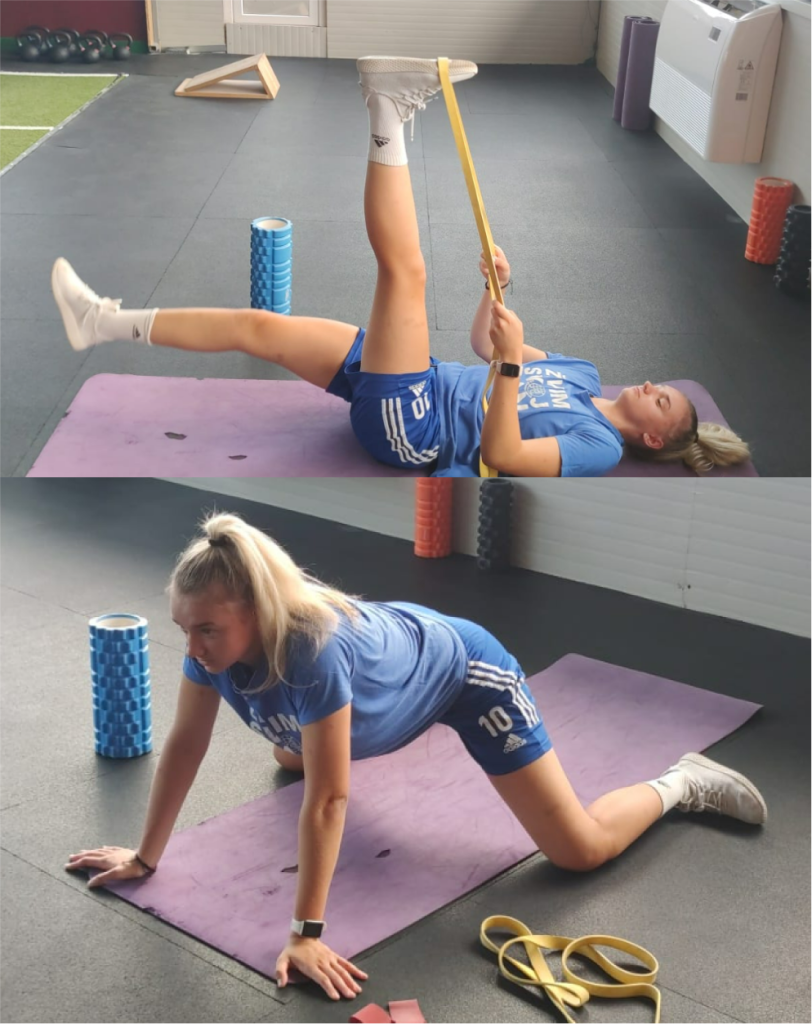
The relaxation and stretching exercises usually last from 30 to 60 seconds per muscle group. Following that, we move on to mobility exercises, where the goal is to enhance the mobility of the entire body. Although we prioritize hip mobility due to its importance, we try to cover all regions of the body.
There are typically 3 to 6 exercises designed for each joint system. Each exercise involves either 10 to 20 repetitions or a 30 to 60-second hold. The primary objective during this phase is to achieve a significant increase in our players’ range of motion. This is because post-match, it’s common for flexibility to decrease, and if left unaddressed, this can lead to potential issues within the team. That’s why our focus on mobility is crucial – it helps prevent such problems and ensures our players maintain their performance levels.
Without going into detail about each component of the recovery group, I’ll briefly mention the others. Following relaxation, stretching, and mobility exercises, we include breathing exercises, core activation routines, and upper body strength or hypertrophy exercises. The choice of training method, especially in our primary exercises, is crucial. To finish up our sessions, we often include a 20-minute bike ride or a light jog around the field. Coaches often like to add some soccer tennis for a short and fun burst of activity.
One aspect that has piqued my interest lately is aerobic training and capillarization, so I’ve started using it whenever possible. This is usually on MD+1, but we try to incorporate it more frequently. This idea was inspired by a conversation I had with Marc Cleary on the topic of recovery markers (which you can listen to here: Markers of Recovery with Marc Cleary. Marc mentioned that in the NBA, they often use light shooting practice the day after a game, and it was found that even a 20-minute session that induces light sweating can have a positive antioxidant effect. Another interesting example I encountered was in hockey training, which really surprised me. Capillarization training was incorporated almost daily for 20 to 45 minutes. Initially, it was sometimes divided into three segments at the beginning, middle, and end of the training session. For this type of training, I liked Joel Jameson’s term, “Rebound training”.
References
- Hopper, D. and Deacon, S., 2015. Das Miofascial-Release-Technikkonzept: Funktionelle Anatomie. Georg Thieme Verlag.
- Cheatham, S. W. and Kolber, M. J., 2015. The Effects of Self-myofascial Release Using a Foam Roll or Roller Massager on Joint Range of Motion, Muscle Recovery, and Performance: a Systematic Review. Sports Physical Therapy, 16(1), pp. 87-93.
- Weerapong, P., Hume, P. A., and Kolt, G. S., 2005. The Mechanisms of Massage and Effects on Performance, Muscle Recovery and Injury Prevention. Journal of Sports Science & Medicine, 4(1), pp. 1-13.